Autoload is the Add/Edit wizard to enter your listings into the MLS® if Xposure™ if your boards main MLS® system. Some boards will add/edit listings in an alternative MLS® software. You can save the listing as a draft to return to at a later time, making it easy to open while at the listings appointment to enter specs & features and even room dimensions on the go. Once you have entered all the listing details, you will submit your listing for approval by either your board or broker staff before it is made public.
There are multiple steps to complete the listing. Depending on your board, you may have 6 or event 7 steps in total, as the measurements are included in your data entry step only and open houses are not available in some boards.
1. Property
The first step is the subject properties civic and legal address entry. In some boards, the street name will populate as you type in the Street Name field.
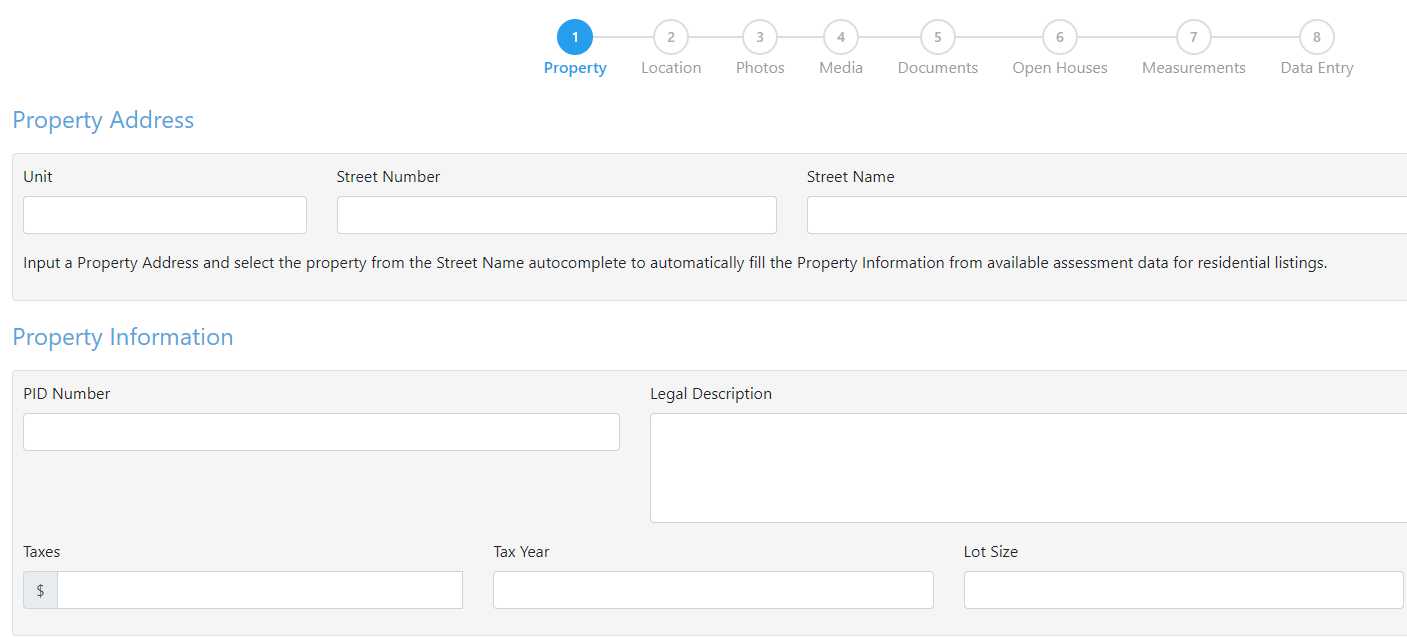
When you are finished entering the information, you can move to the next step by either clicking the Next button at the bottom right hand corner, or by clicking the next step along the top.
2. Location
You will need to drop the pin in step 2 for the location to populate correctly. There is an Accurate or Approximate toggle that you switch between as needed.
To drop the pin, the curser will be a "+" sign on the map. When you click on the map, the red icon will populate. If you need to move the pin, simply re-click on the map where it needs to be moved to.
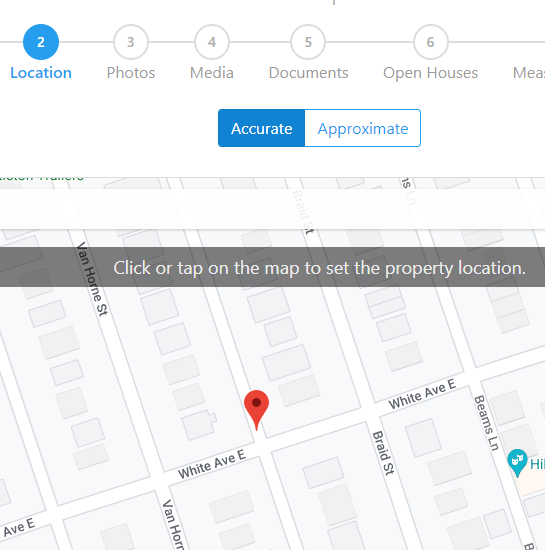
When you are finished dropping the pin, you can move to the next step by either clicking the Next button at the bottom right hand corner, or by clicking the next step along the top.
3. Photos
In step 3 you can add your photos, and make rearrange them if needed. You also are able to add photos after your listing is approved.
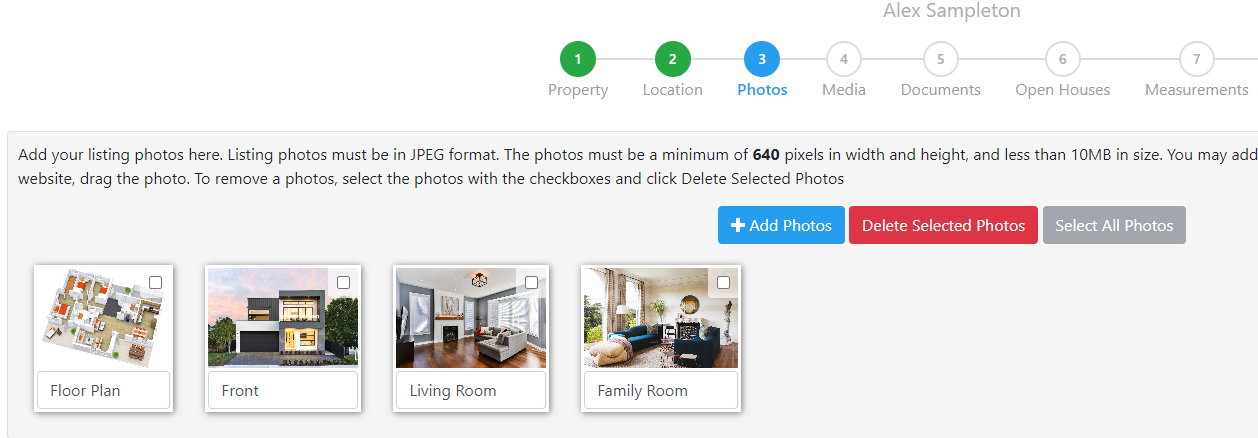
Click the + Add Photos button. A windows box will open to select the photos from your device.
Photos must be a minimum of 640 pixels in width and height, and less than 10 MB in size.
TIP ~ Agents should also be aware when they are taking photos on your device, turn your phone to the left when going from vertical to horizontal photos. This will stop the photo from uploaded upside down. Horizontal photos do present on most screens and devices more favorable then a vertically shot photo.
Once you have selected your photos, you can drag and drop the photos in the order you would like. Click the next button on the bottom right hand side to save the photos.
4. Media
The media is another area that you can manage after your listing is active.
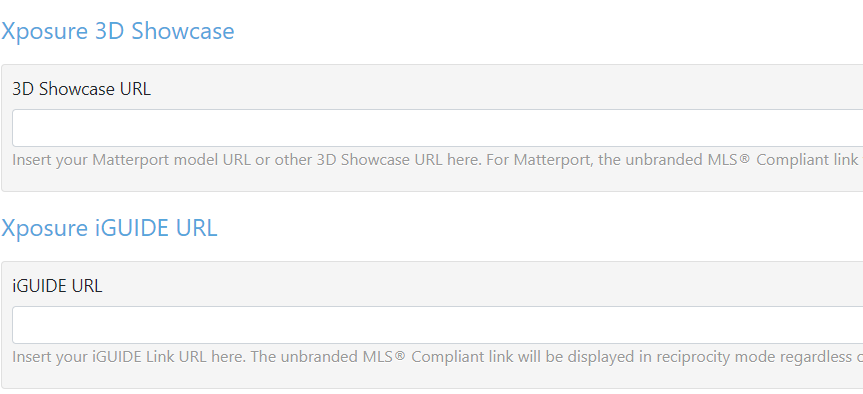
As there are many variations for media files, the media area has several places to upload the relevant file. Some media will be uploaded as a PDF or photo, while others are a URL that are then embedded.

If you are adding a 3D showcase, or an iGuide link, they are only to be uploaded in the proper field. Do not load your 3D showcase link into the iGuide link or vice versa. If the link is added to the wrong field, the unbranded MLS® compliant link may break.
When you are finished adding your media, you can move to the next step by either clicking the Next button at the bottom right hand corner, or by clicking the next step along the top.
5. Documents
Think of the documents area as your virtual filing cabinet. Once you have selected the document type, and uploaded the document, you have the option to limit who has visibility of each document. There is an option that limits the visibility to only you.

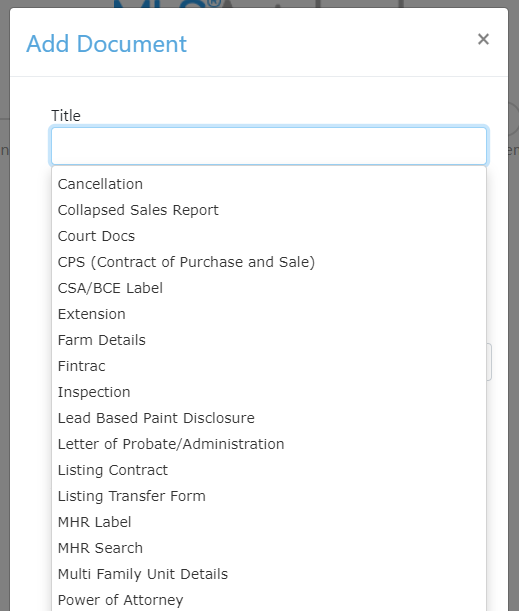
After you have clicked the Add Document button, a pop up will appear. Click into the Title field for the list of document types to populate. You can then select the type of document you are uploading.
Once you have made the selection, you can then add a description, and in most cases you can select who the document is visible to. There are some types, like the below Listing Contract, that will only be visible to you and your managing broker.
Click the Choose File button to find the document on your device to upload.
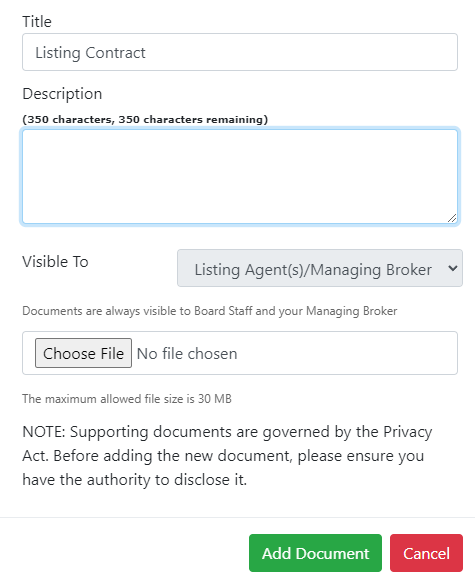
Once you have uploaded the document, you can click the green "Add Document" button as the bottom of the pop up.
You can then repeat the steps to upload any remaining documents.
When you are finished adding your documents, you can move to the next step by either clicking the Next button at the bottom right hand corner, or by clicking the next step along the top.
6. Open Houses
If your board has access to add an Open House in Autoload, it will be available as step 6.
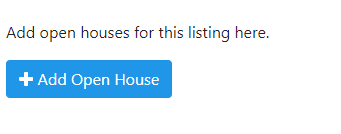
When you click into step 6, you will see the "Add Open House" button like below. Click it to continue.
Similar to the documents area, a pop up will open, allowing you to set up the open house.
You can select between an agent tour or public open house in the type drop down.
In the host drop down, you can alternatively select another agent to host your open house. The default will be set to you.
The next steps are to select the date and time of the open house.
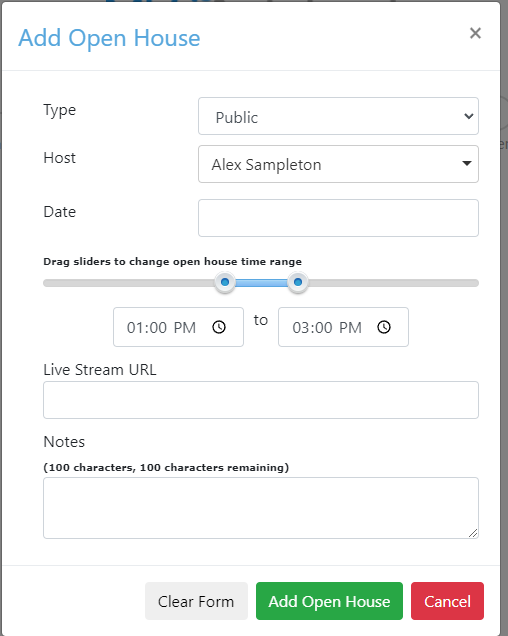
If you would like to add a live stream URL you can add the link to the necessary field. If there are any instructions you would like to share, you can add those to the notes area.
The final step is to click the green "Add Open House" button.
When you are finished adding your open house you can move to the next step by either clicking the Next button at the bottom right hand corner, or by clicking the next step along the top.
7. Measurements
Some boards will have measurements as step 7, while others will have a room matrix as part of the data entry step. If your board has measurements in step 7, that is where they should be entered to ensure they are uploaded correctly.
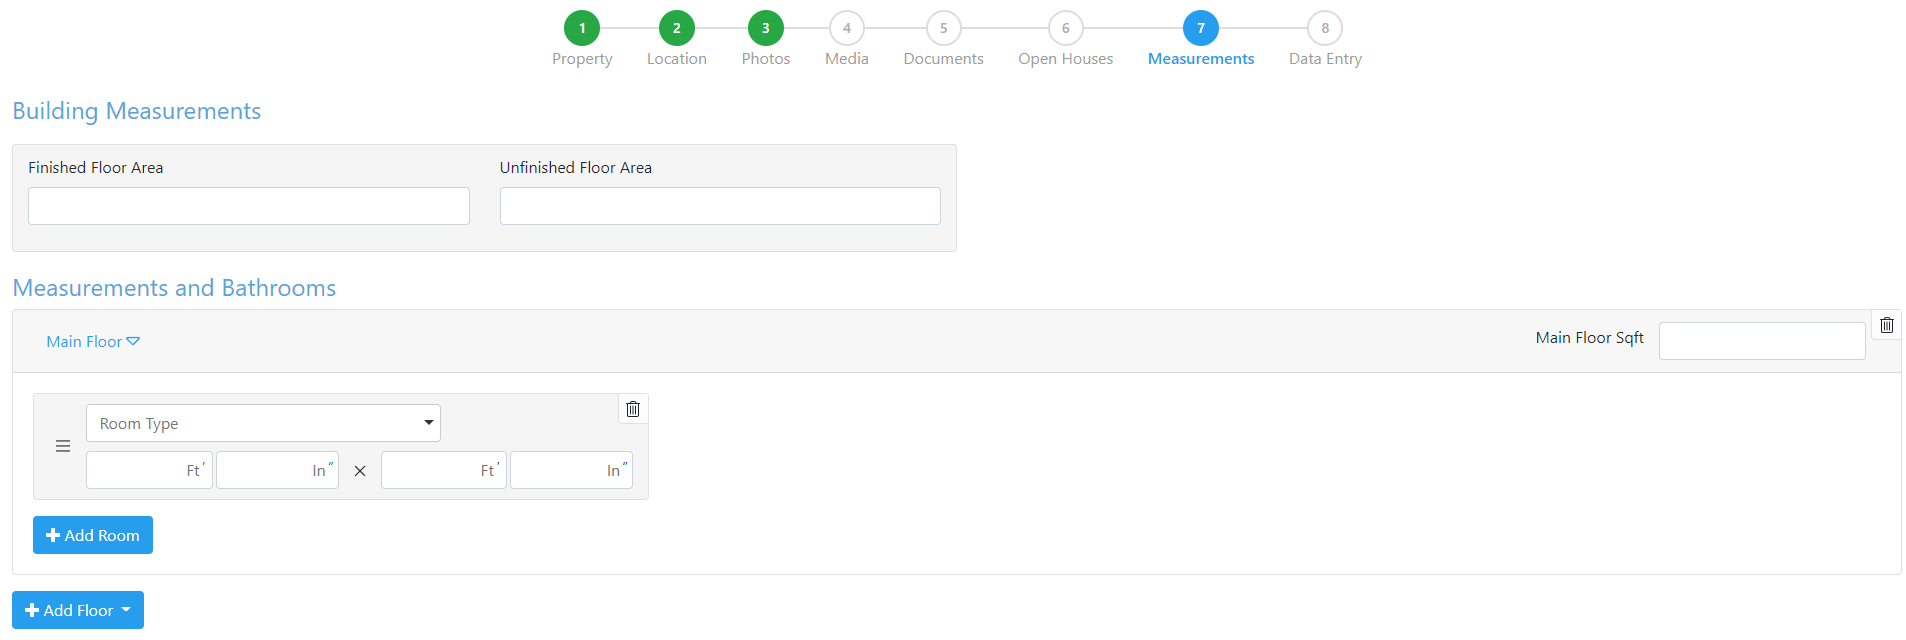
Below is the full view of the screen. The floors and rooms are added as needed for the properties room room matrix along the left hand side, and the floor sqft total is towards the right.
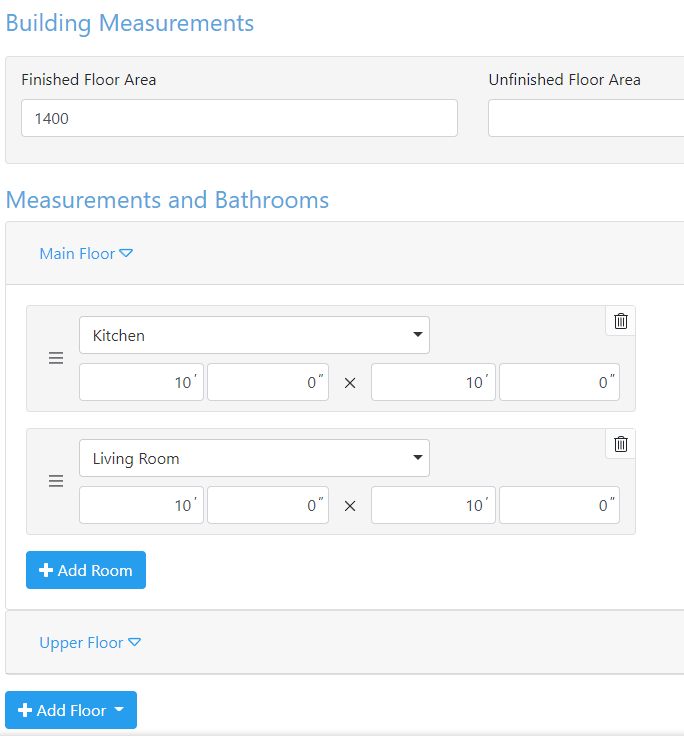
Below is a screenshot that highlights how the floor plan is essentially built. Select the type of room from the drop down list, and enter the measurements. If you need to add another floor, click the Add Floor button and select the floor type.
Make sure to include your finished & unfinished floor areas!
When you have finished entering your floor(s) and rooms, you can move to the next step by either clicking the Next button at the bottom right hand corner, or by clicking the next step along the top.
8. Data Entry
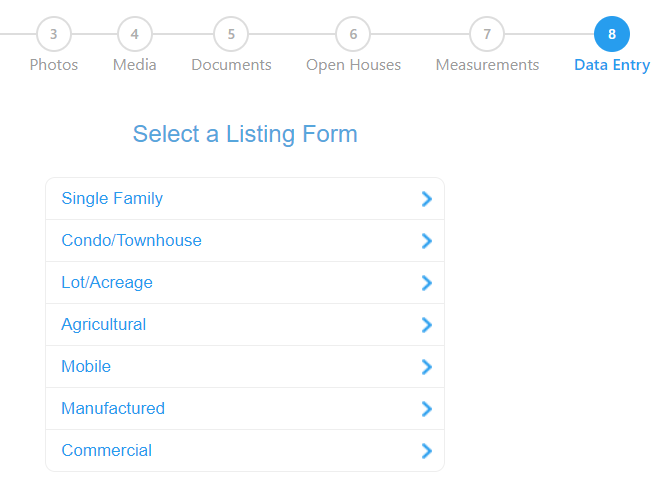
In the last step, you will be presented with options that are dependent on your board; they may not be the examples shown below. Essentially, you will be presented with a list of forms that represent the types of Data Input options your board has. When you select the type of property, you will be directed to the data entry form with the relevant fields.
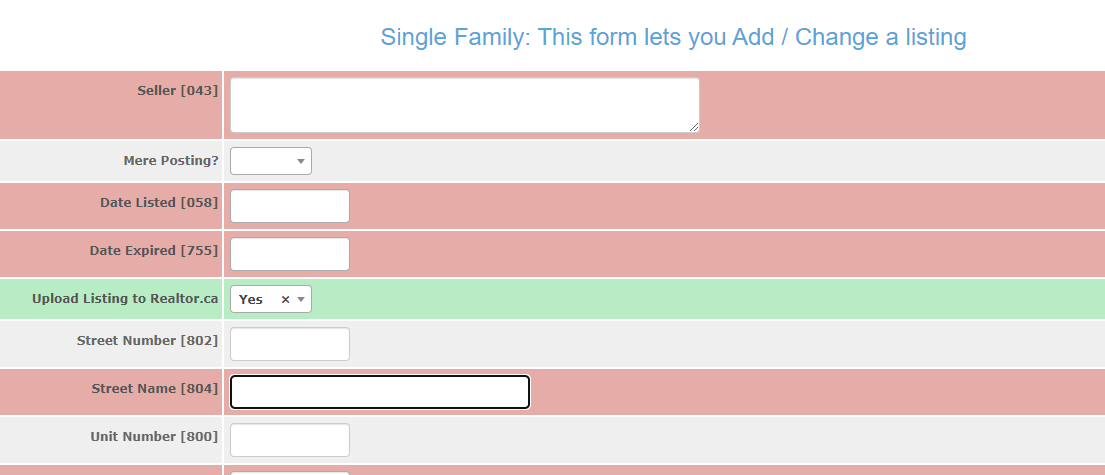
For example, the Single Family form below would have the fields only associated with a Single Family Dwelling.
Once you have selected the type of listing, a new screen opens. You will see red, grey and green fields like below. Some boards will also have a yellow field, which will be shown further down.
A red field is a required field
A green field is a required field that has acceptable data entered
A grey field is an optional field.
By the end of the form, you will need no red fields left to proceed.
For some boards, you will see a yellow field regarding the age or year the property was built. Yellow means one of the other field of data is needed. You can enter the year the property was built, ie 1980, or you can enter the building is 22 years old. Once you have entered a date in 1 field, the yellow will disappear, and it will become green.
At the bottom of the screen, you will have the options below. If you have completed your listing and it is ready for approval, Submit your listing. If you would like to save it to continue at a later time, click Save Draft.
Print Preview is a nice view that can be used as a final review before submitting. This is also where you can print off, or save as a pdf, a copy of the data entry if your board or broker requires a paper copy.
The last option is to cancel the listing. No information will be saved and is not retrievable by our support or your board support.
